티스토리 뷰

Elasticsearch를 cloud 환경에서 사용하고 Spring Boot와 연동하는 방법은
이전 글에서 다뤘다.
이번 포스팅은 내가 개발하면서 특이하다고 느꼈던 것 몇 가지를 정리하고자 한다.
1. credential 처리하기
credential 을 처리 하기 위해, 먼저 username과 password를 생성해야 한다.
그런데 Elastic cloud 에서 왜 숨겨놨는지 찾기 힘든 위치에 있어서 찾는데 고생을 좀했다.
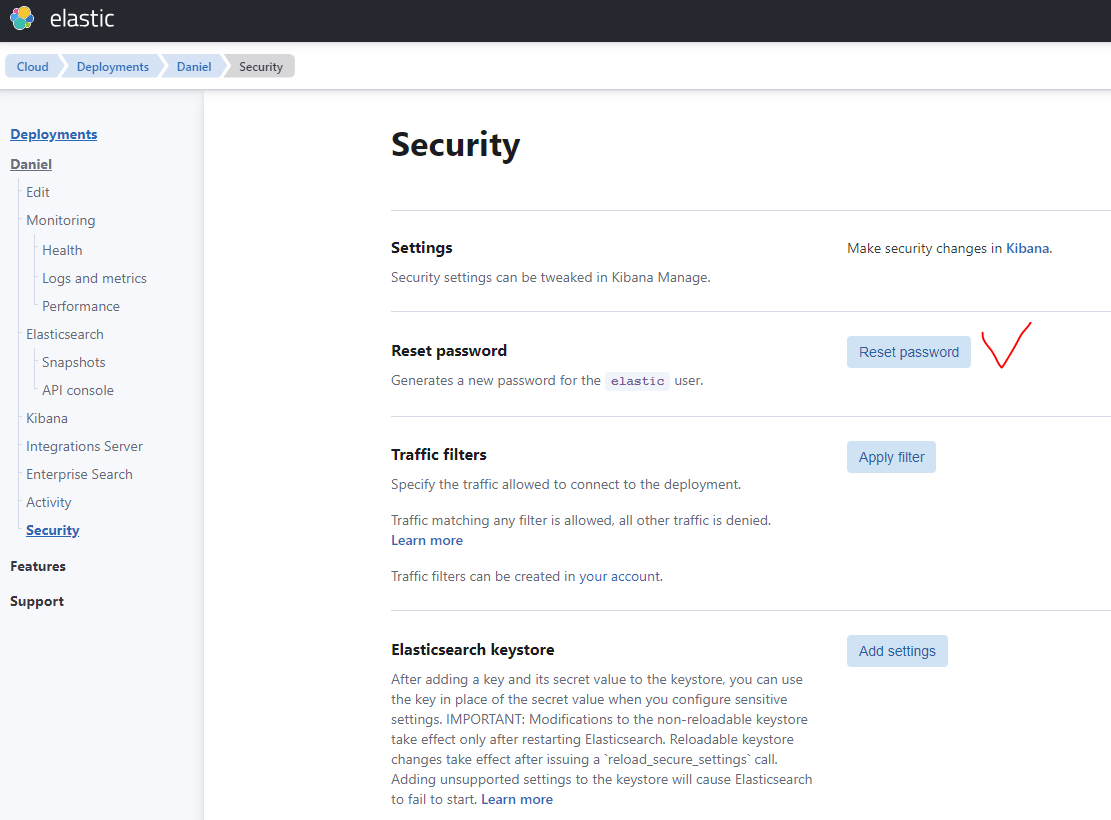
ES main 페이지 > 본인 계정 옆에 Manage 버튼 클릭 > 좌측 Security 를 클릭
이러면 아래 페이지가 나오는데 여기서 Reset password를 누르면 elastic user의 password가 생성된다.
복사해놓거나 다운로드한다.

이제 client에서 위에 생성한 username과 password를 사용해야한다.
엘라스틱 서치에서 제공하는 문서를 참고해서 작성했다.
@Configuration
public class RestClient {
    @Value("${elastic.hostname}")
    private String ELASTICSEARCH_HOSTNAME;
    @Value("${elastic.username}")
    private String ELASTICSEARCH_USERNAME;
    @Value("${elastic.password}")
    private  String ELASTICSEARCH_PASSWORD;

    @Bean
    public org.elasticsearch.client.RestClient createClient() {
        final CredentialsProvider credentialsProvider = new BasicCredentialsProvider();
        credentialsProvider.setCredentials(AuthScope.ANY,
                new UsernamePasswordCredentials(ELASTICSEARCH_USERNAME, ELASTICSEARCH_PASSWORD));

        RestClientBuilder builder = org.elasticsearch.client.RestClient.builder(
                                               new HttpHost(ELASTICSEARCH_HOSTNAME, 443, "https"))
                                                                       .setHttpClientConfigCallback(new RestClientBuilder.HttpClientConfigCallback() {
                                                                           @Override
                                                                           public HttpAsyncClientBuilder customizeHttpClient(HttpAsyncClientBuilder httpClientBuilder) {
                                                                               return httpClientBuilder.setDefaultCredentialsProvider(credentialsProvider);
                                                                           }
                                                                       });

        return builder.build();
    }
}
2. index mapping 하기
간단히 index가 dense_vector property를 갖도록 설정해보자
public static final String ES_COSINE_SEARCH_MAPPING = """
            {
              "properties": {
                "dense_vector": {
                  "type": "dense_vector",
                  "dims": 1536
                }
              }
            }
            """;
PUT 매서드를 날려서, 인덱스에 프로퍼티를 mapping 할 수 있다.
String endPoint = "[인덱스이름]/_mapping"
String dataJson = ES_COSINE_SEARCH_MAPPING;
Request request = new Request("PUT", endPoint);
try {
	if(!ObjectUtils.isEmpty(dataJson)) {
		HttpEntity entity = new NStringEntity(dataJson, ContentType.APPLICATION_JSON);
		request.setEntity(entity);
	}

	Response response = restClient.performRequest(request);
	return EntityUtils.toString(response.getEntity());
} catch(Exception e) {
	return null;
}
endPoint에 추가로 "/_mapping"을 넣어줘서 mapping 설정을 인덱스로 보낼 수 있다.
주의할 점은 저장하려는 인덱스에 해당 필드 이름과 같은 이름의 값(mapping 하려는 값과 다른 타입)이 들어가 있으면 안된다는 점이다.
이와 같이 검색도 _search를 통해 다룰 수 있는데, 이 내용은 다음에 다시 다루도록 하겠다.
3. index 생성여부 판단하기
public boolean indexExists(String endPoint) {
    Request request = new Request("HEAD", endPoint);
    try {
        Response response = restClient.performRequest(request);
        // 404면 인덱스가 없다.
        return ResultCode.NOT_FOUND.getHttpStatus().value() != response.getStatusLine().getStatusCode();
    } catch(Exception e) {
        return false;
    }
}
HTTP 매서드 중 HEAD를 통해 index의 존재여부를 파악할 수 있다.
만약 response code가 404가 온다면 index가 존재하지 않는다는 의미이다.
여기선 별도의 에러처리를 하지 않았는데, 에러가 남을 수 있으니 익셉션 핸들링하는 코드가 추가적으로 필요할 것이다.
마치며
다음 글이 Elasticsearch에 관한 마지막 글이 될 것 같다.
search 알고리즘 두 종류에 대해 다룰 건데,
어떻게 썼냐에 대해서만 다룰거지 알고리즘 자체에 대해서는 자세히 다루지 않을 것 같다.
'개발 > 뭔지모르면여기' 카테고리의 다른 글
- Total
- Today
- Yesterday
- OpenAI
- Log
- cache
- 후쿠오카
- lambda
- S3
- Redis
- ecs
- elasticsearch
- terraform
- EKS
- Spring
- AOP
- JWT
- java
- 스프링부트
- 티스토리챌린지
- AWS
- springboot
- Kotlin
- 람다
- CORS
- ChatGPT
- GIT
- AWS EC2
- docker
- 인프런
- 오블완
- serverless
- CloudFront
| 일 | 월 | 화 | 수 | 목 | 금 | 토 |
|---|---|---|---|---|---|---|
| 1 | 2 | 3 | ||||
| 4 | 5 | 6 | 7 | 8 | 9 | 10 |
| 11 | 12 | 13 | 14 | 15 | 16 | 17 |
| 18 | 19 | 20 | 21 | 22 | 23 | 24 |
| 25 | 26 | 27 | 28 | 29 | 30 | 31 |
